Breaking Down Breach Logic is the technical blog by Echelon's Offensive Security team, examining and sharing how breaches actually unfold. In this entry, read the latest by Diego Pérez Barrueta, Senior Offensive Security Consultant, at Echelon.
During a recent mobile app penetration test, I found that the application used mutual TLS (mTLS) to communicate with the server. While this is not uncommon, many developers don’t implement it. mTLS prevented me from intercepting HTTPS traffic in Burp Suite. To resolve this, I had to extract the client certificate and its private key, bundle them into a PKCS#12 file, and import the file into Burp to establish a full mTLS connection.
For demonstration purposes, I vibe-coded an iOS application and a server that replicates the same scenario as the real pentest. These tools are available on my GitHub if you want to try them yourself.
Initial Phase
I had everything set up to start the pentest. The application was installed on a jailbroken iPad, Burp was up and running, and certificate pinning was disabled using “SSLKillSwitch.” I ran the application and immediately noticed a 403 status code in the server responses, even before authenticating to the backend.
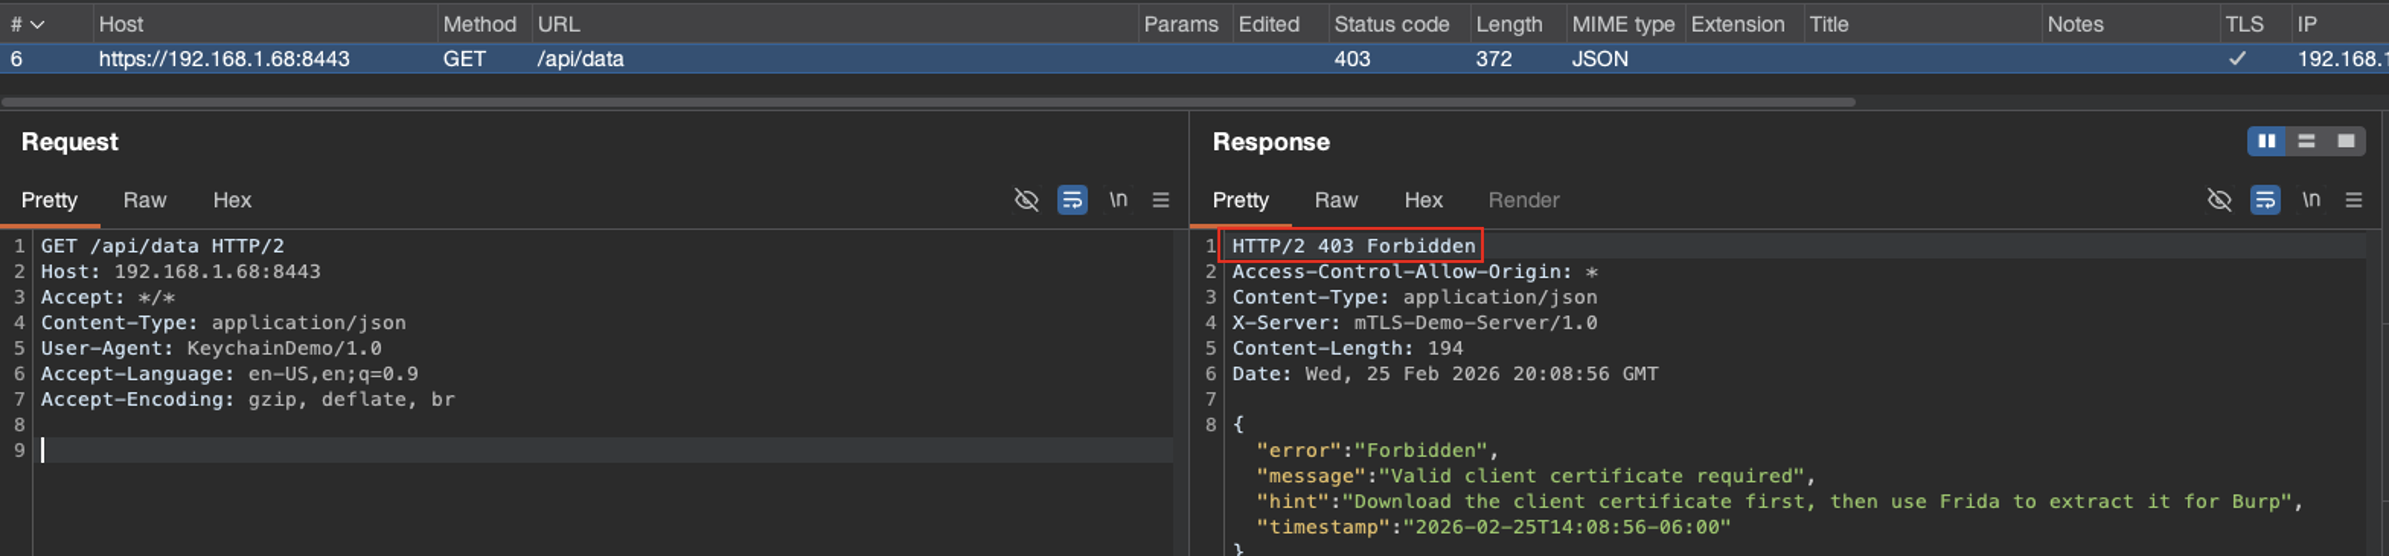
I made an educated guess, based on previous experience, that mTLS was probably getting in my way.
What is mTLS?
Mutual TLS (mTLS) requires both the client and the server to authenticate each other using signed certificates during the TLS handshake, ensuring two-way trust. Unlike standard TLS, where only the server is verified, mTLS requires the client to present a certificate, thereby verifying identities on both sides before encrypted data is exchanged. Once the trust has been established, both the server and the client will encrypt data using their respective certificates and private keys.
Looking for the Certificate and Private Key
First, I decompressed the IPA file and searched for the client certificate, but I found only a CA certificate. Then, I checked the device’s Keychain using the tool “keychain_dumper,” and found:
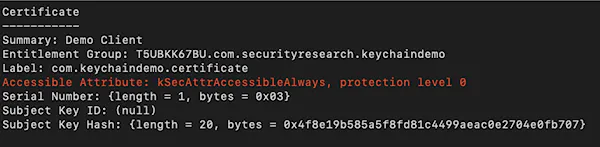
This was it! The client certificate was stored in Keychain, and its accessible attribute was set to “kSecAttrAccessibleAlways,” which meant the item was accessible even when the device was locked (a bad security practice).
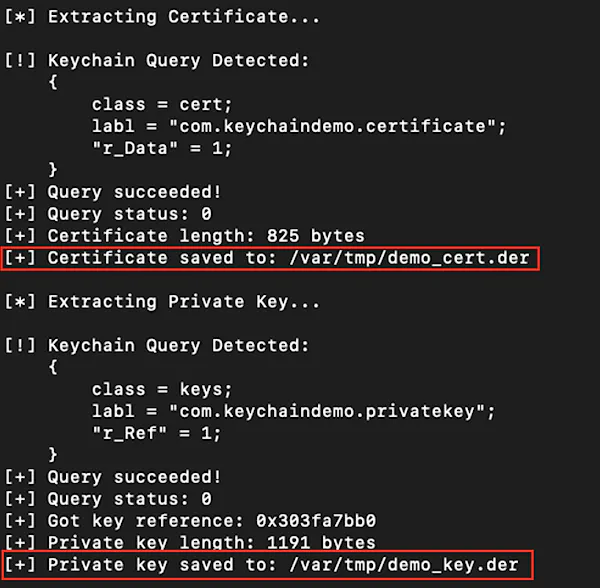
Now, I was missing the second piece of the puzzle, the private key. “Keychain-dumper” was throwing an error because it couldn’t find “openssl” in “/usr/bin,” and because of the rootless jailbreak, “/usr/bin” was read-only. So I decided to use the Frida framework and wrote a script to hook the function “SecItemCopyMatching.” This function is part of the iOS Security framework and is used to read items from the Keychain. This way, I could easily get the certificate and private key when the application retrieved them.
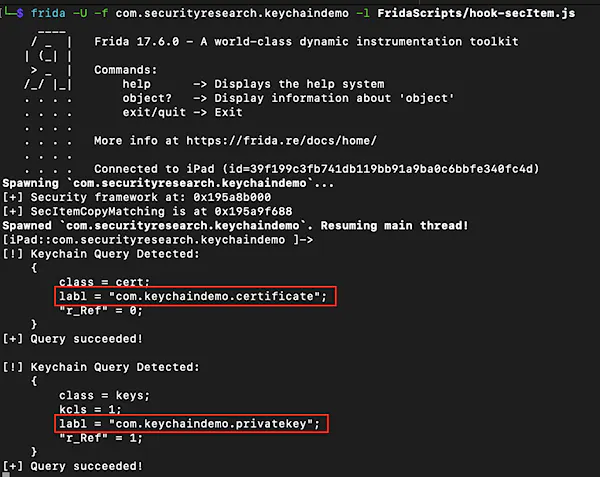
I could confirm that every time the application sent an HTTPS request to the backend server, the certificate and private key were retrieved. So I modified the Frida script to save both of them. Saving the certificate was straight forward: the function “SecItemCopyMatching” returned a pointer to the plaintext certificate. Saving the private key required the use of the “SecKeyCopyExternalRepresentation” function, which is part of the iOS Security framework, to copy the plaintext key.
Signing Client Requests in Burp Suite
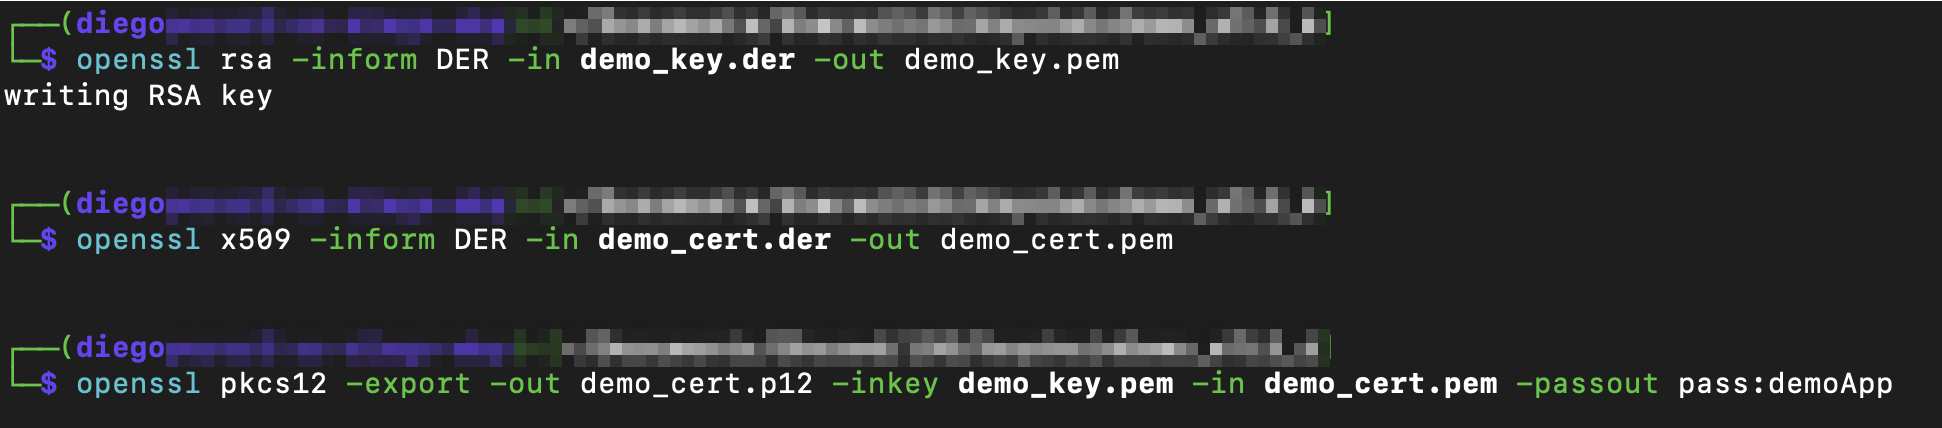
I transferred the files to my computer and used “openssl” to convert them to a format that Burp could handle. The first step was to convert both to PEM format. Then bundle them into a PKCS#12 file; for this demo, I set the password to “demoApp,” but it’s not mandatory.
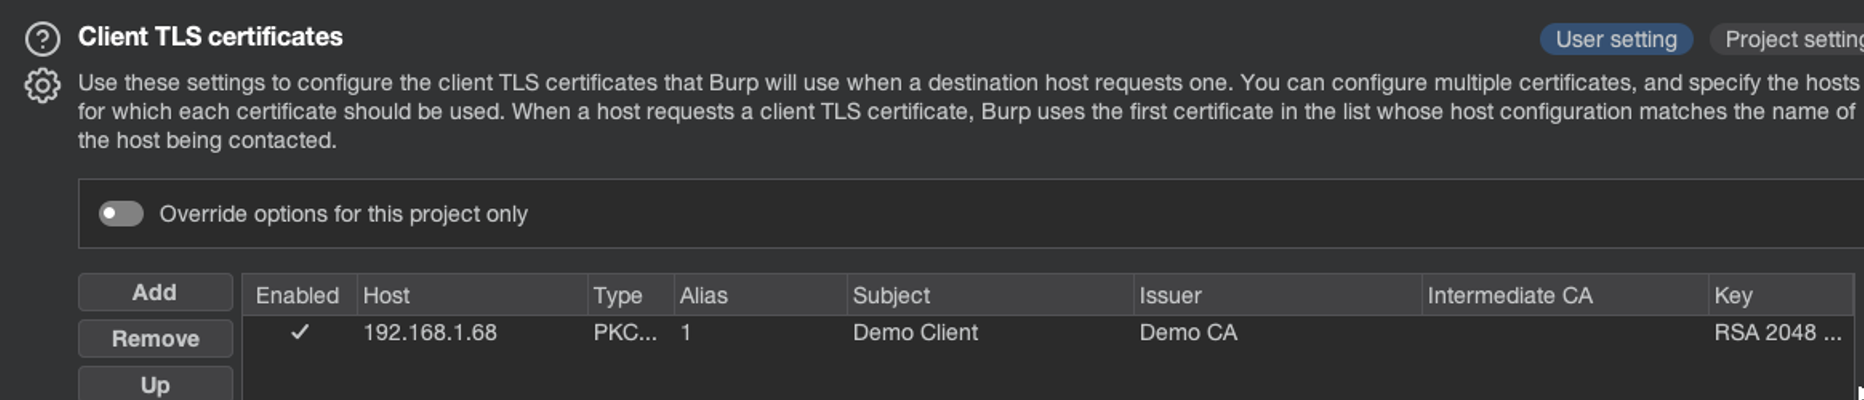
Then, I imported the file into Burp. This can be done from the Proxy settings > Network > TLS > Client TLS certificates.
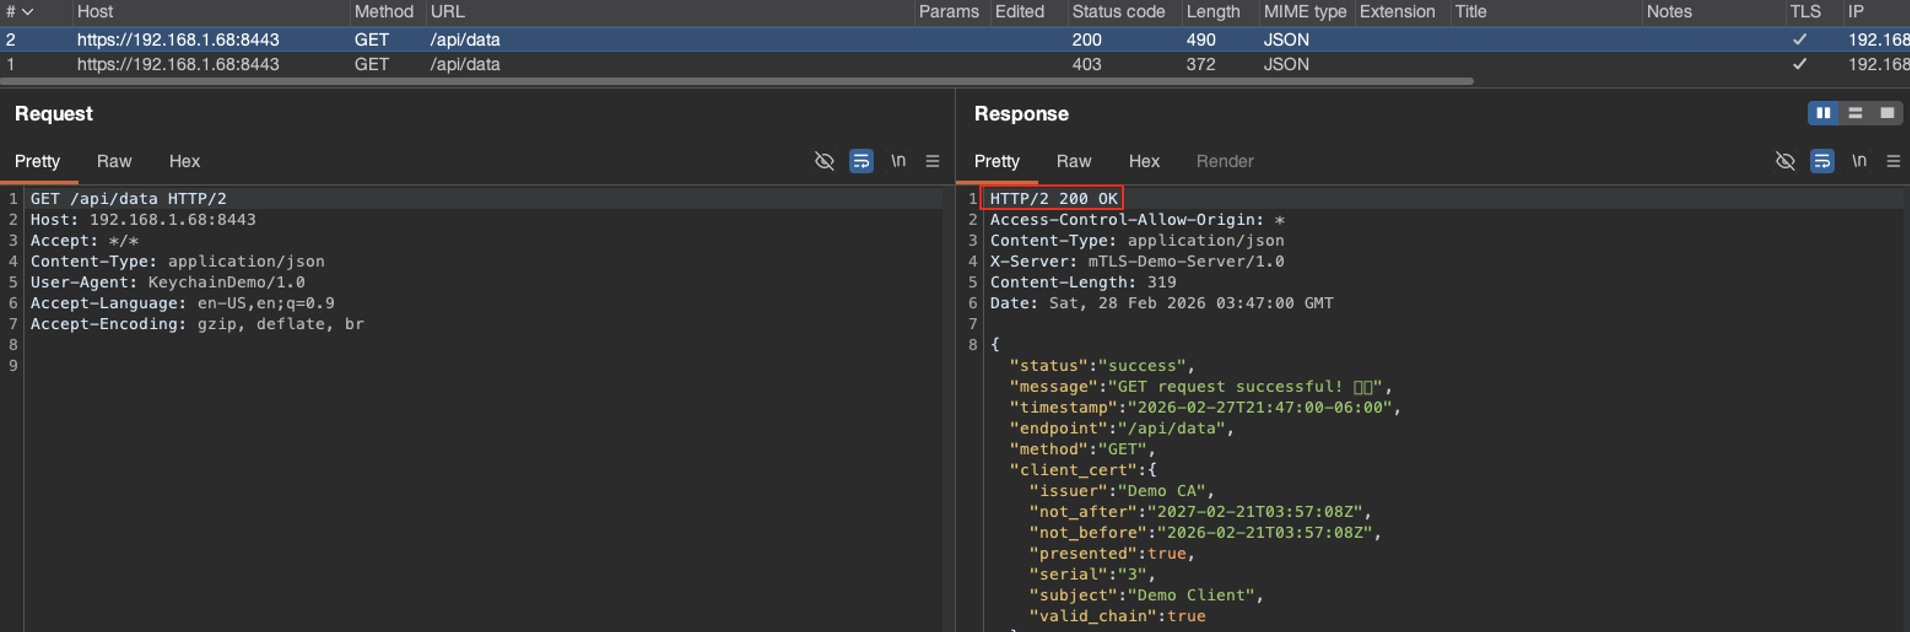
After completing it, I was able to sign the client’s request, establish full mTLS communication, and intercept HTTPS traffic. I knew it worked because the server responses had 200 status codes and included the API data.
Recommendations
In this blog, I demonstrated that storing private keys in the Keychain is not safe because it is easy to copy the plain-text version of the keys and save them in a file. Apple recommends using Secure Enclave:
This means that the plain-text version of the key is never leaked from the Secure Enclave, making it very difficult to access. At the time of writing, I am not aware of any method to do so, but that doesn’t mean it is impossible.
For more information on how to implement Secure Enclave, refer to this document in the Apple Developer documentation.
If you want to try it out or practice, get the demo application and Frida scripts from my GitHub repo.
Happy hacking!